# Bubblegram Docs
## Quick Start
Get from zero to a working chat widget in under 5 minutes.
1. **Create an account** Sign up at [dash.bubblegram.co](https://dash.bubblegram.co).
2. **Create a project** Enter a name and your site's domain (e.g. `example.com`).
3. **Connect Telegram** Click **Link Telegram** in your project. One tap adds the bot and links the group. See [Telegram Setup](#telegram-setup).
4. **Embed the script tag** Paste one line of HTML into your site. See [Embed the Widget](#embed-widget).
5. **Done.** The chat bubble appears on your site. Visitors send messages; you reply in Telegram. Replies are delivered back to the widget in real time.
---
## Telegram Setup
Bubblegram delivers visitor messages to a Telegram group. Each visitor gets a dedicated topic thread so conversations stay organized.
---
### 1. Create a Telegram group
1. Open Telegram and tap the pencil icon (or "New Message").
2. Choose **New Group**.
3. Optionally add members (you can add yourself from another account, or a teammate). You can also skip this and create the group alone.
4. Give the group a name, then create it.
---
### 2. Enable Topics (Forum mode)
Topics allow each visitor to get their own thread inside the group. Without this, all messages arrive in one mixed stream.
**On desktop**
1. Open the group and click **Manage group**.
2. Go to **Topics** and enable it.
3. Set the display to **List**. This makes it easier to scan and manage multiple visitor conversations.
**On mobile**
1. Tap the group name at the top to open group info.
2. Tap **Group settings**.
3. Go to **Topics** and enable it.
4. Select **List** as the display style.
> **Warning:** **Required.** Topics must be enabled before linking. The bot creates a new topic for each visitor.
> **Info:** **Unmute the group.** Telegram mutes groups by default. Open the group, tap the bell icon, and select **Unmute** so you get notified when visitors send messages.
[Video: /assets/EnableTopics.mp4](/assets/EnableTopics.mp4)
---
### 3. Add the bot
In the dashboard, open your project and click **Link Telegram**. This opens Telegram with the bot pre-selected and admin permissions pre-filled. Confirm. The bot joins, gets admin rights, and links your group automatically. No extra steps.
> **Info:** **Token expires in 10 minutes.** If the link expires, go back to the dashboard and click **Link Telegram** again to get a new one.
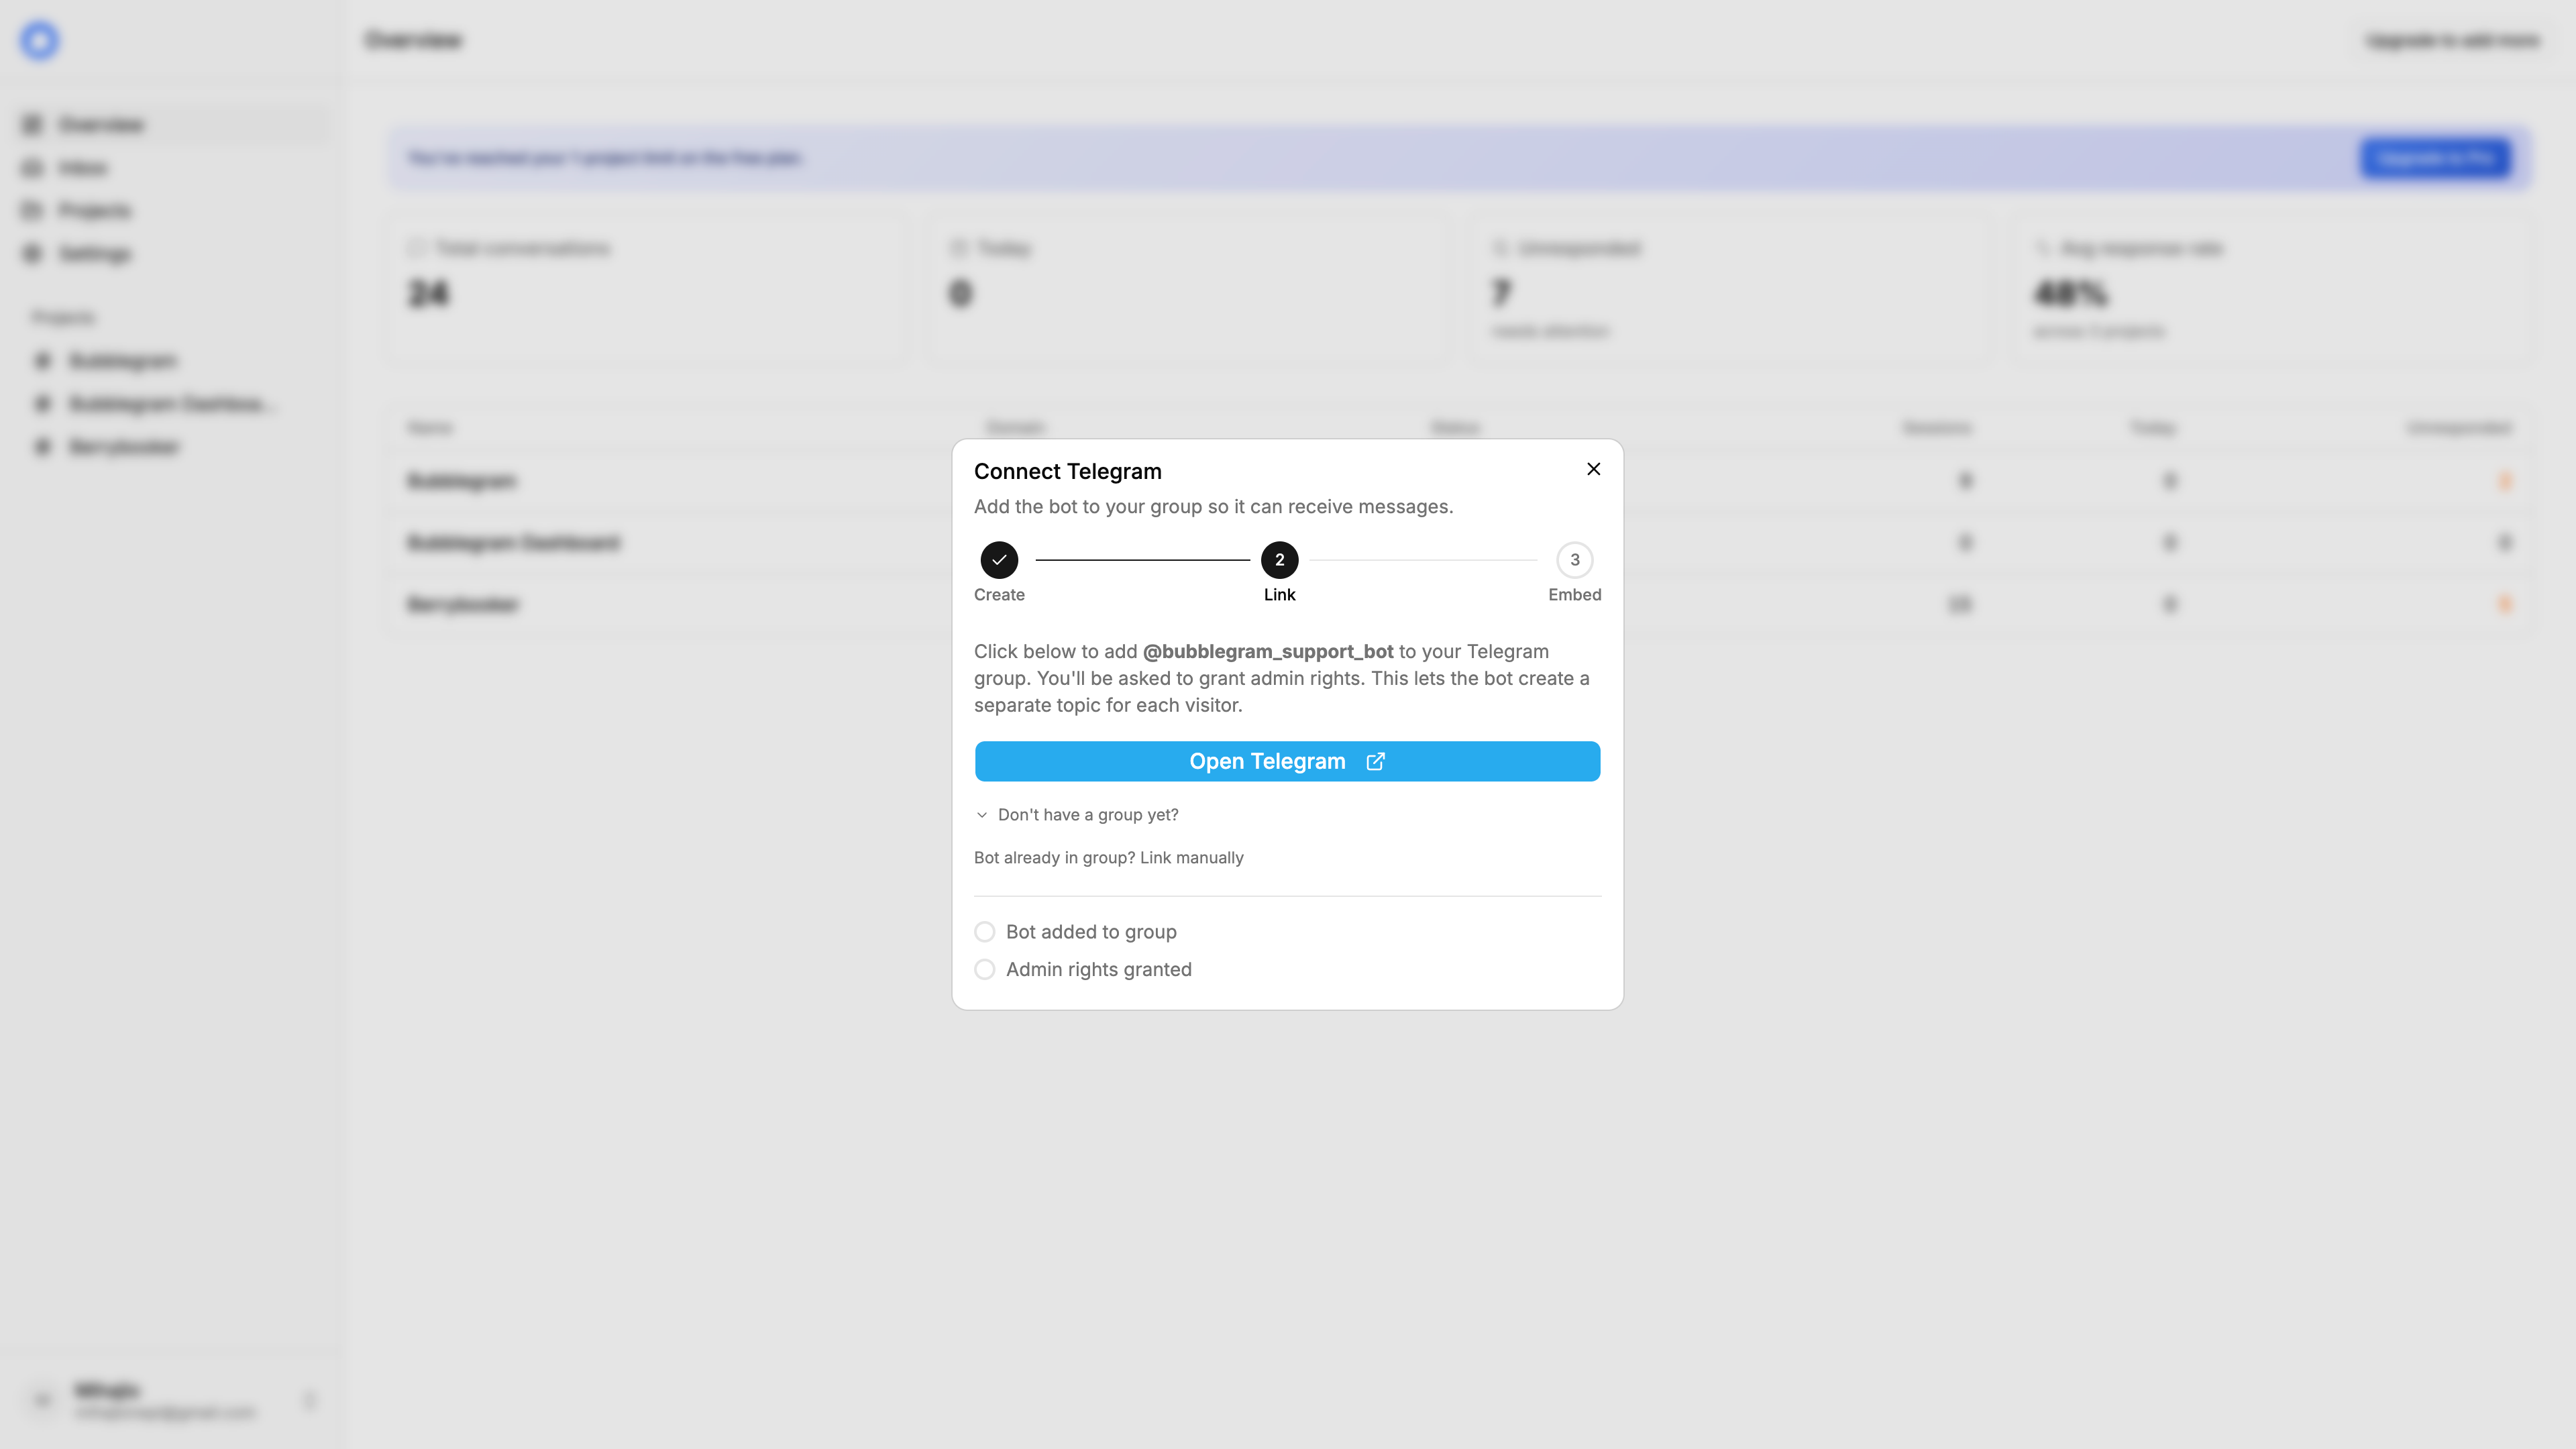
**Already have the bot in the group?**
If the bot was already a member before you started setup, the deep link won't fire. Instead, copy the `/start` command from the dashboard and send it in the group manually:
```
/start YOUR_LINK_TOKEN
```
The bot replies: *"Project linked successfully."* Then promote it to admin. It needs permission to manage topics, post messages, and delete messages.
---
## Embed the Widget
The widget loads from a CDN and is initialized with your project's API key.
---
### Script tag
Add this to your HTML, just before the closing ``, not the ``.
Your project may not be linked. Open the project in the dashboard. If the status shows **Not linked**, click **Link Telegram** and complete the flow. The bot must be in the group and have admin rights.
### Origin mismatch error
The domain saved in your project settings must exactly match the domain your site runs on. Enter it without `https://` and without a trailing slash. For example: `example.com`, not `https://example.com/`. Subdomains count as different domains.
The bot needs admin rights. Open your Telegram group, go to **Administrators**, find the bot, and ensure it has permission to manage topics, post messages, and delete messages. Without these, topic creation fails silently.
### I set up forwarding in Gmail but no email arrives
Almost always the last step. Go back to Gmail's **Forwarding and POP/IMAP** tab and check that **Forward a copy of incoming mail to** is actually selected, then scroll down and click **Save Changes**. Verifying the address does not switch forwarding on by itself, and Gmail throws the setting away if you leave the page without saving. After that, send yourself a test email from a different account. Only mail arriving after you saved gets forwarded.
This is Gmail failing before it sends anything, not a problem with your Bubblegram address. The usual cause is being signed into several Google accounts in the same browser: open an incognito window, sign into just the one account, and try again. On Google Workspace, forwarding may be disabled for your organization, in which case your admin needs to allow it under Admin Console > Apps > Google Workspace > Gmail > End User Access. Ad blockers and privacy extensions can also break the verification popup. If you've tried several times in a row, wait an hour before retrying.
Click **Re-send email** next to the pending address in Gmail and watch the Email tab. The code appears within a few seconds and is also posted to your Telegram group. If it still doesn't show up, the confirmation never reached us, which usually means the address was pasted with a typo. Compare it against the address on the Email tab character for character, or remove it in Gmail and add it again.
### My test email never showed up in Telegram
Check what you sent. Newsletters, notifications and anything from a `noreply@` address are filtered out on purpose, so they make a poor test. Send an ordinary message from a personal mailbox instead. Also confirm your plan is still Pro: on the Free plan the email channel is set up but incoming mail is not delivered, and we post a notice in your Telegram group once a day when that happens.
### Replies are coming from noreply@mail.bubblegram.co
That's the default sender until your own domain is verified. Finish step 3 on the Email tab by adding the SPF, DKIM and DMARC records at your registrar. Until all three verify, replies still send and still thread correctly, they just come from our address rather than yours.
### Link token expired
Link tokens are valid for 10 minutes. If you waited too long between generating the token and completing the setup, go back to your project in the dashboard, click **Link Telegram** again, and use the newly generated token.
` tag:
```html